Useful Tools
Visualization Tools
Dataset Visualization Tool
MMOCR provides a dataset visualization tool tools/visualizations/browse_datasets.py to help users troubleshoot possible dataset-related problems. You just need to specify the path to the training config (usually stored in configs/textdet/dbnet/xxx.py) or the dataset config (usually stored in configs/textdet/_base_/datasets/xxx.py), and the tool will automatically plots the transformed (or original) images and labels.
Usage
python tools/visualizations/browse_dataset.py \
    ${CONFIG_FILE} \
    [-o, --output-dir ${OUTPUT_DIR}] \
    [-p, --phase ${DATASET_PHASE}] \
    [-m, --mode ${DISPLAY_MODE}] \
    [-t, --task ${DATASET_TASK}] \
    [-n, --show-number ${NUMBER_IMAGES_DISPLAY}] \
    [-i, --show-interval ${SHOW_INTERRVAL}] \
    [--cfg-options ${CFG_OPTIONS}]
| ARGS | Type | Description |
|---|---|---|
| config | str | (required) Path to the config. |
| -o, --output-dir | str | If GUI is not available, specifying an output path to save the visualization results. |
| -p, --phase | str | Phase of dataset to visualize. Use "train", "test" or "val" if you just want to visualize the default split. It's also possible to be a dataset variable name, which might be useful when a dataset split has multiple variants in the config. |
| -m, --mode | original, transformed, pipeline |
Display mode: display original pictures or transformed pictures or comparison pictures.original only visualizes the original dataset & annotations; transformed shows the resulting images processed through all the transforms; pipeline shows all the intermediate images. Defaults to "transformed". |
| -t, --task | auto, textdet, textrecog |
Specify the task type of the dataset. If auto, the task type will be inferred from the config. If the script is unable to infer the task type, you need to specify it manually. Defaults to auto. |
| -n, --show-number | int | The number of samples to visualized. If not specified, display all images in the dataset. |
| -i, --show-interval | float | Interval of visualization (s), defaults to 2. |
| --cfg-options | float | Override configs.Example |
Examples
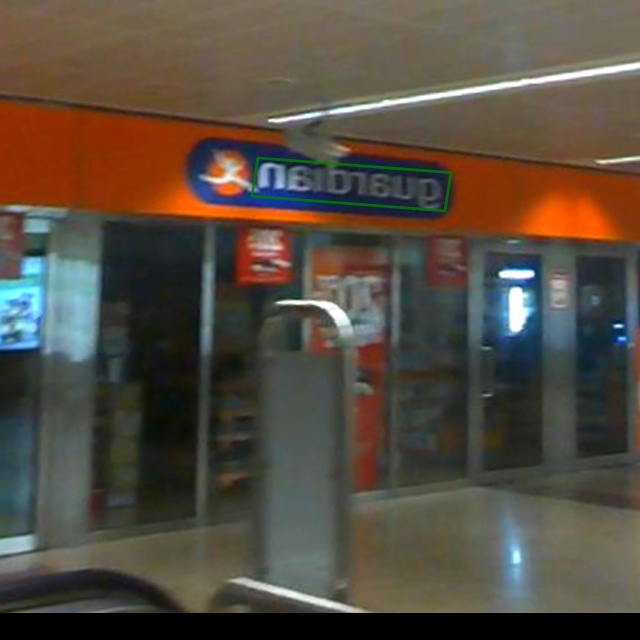
The following example demonstrates how to use the tool to visualize the training data used by the “DBNet_R50_icdar2015” model.
# Example: Visualizing the training data used by dbnet_r50dcn_v2_fpnc_1200e_icadr2015 model
python tools/visualizations/browse_dataset.py configs/textdet/dbnet/dbnet_resnet50-dcnv2_fpnc_1200e_icdar2015.py
By default, the visualization mode is “transformed”, and you will see the images & annotations being transformed by the pipeline:

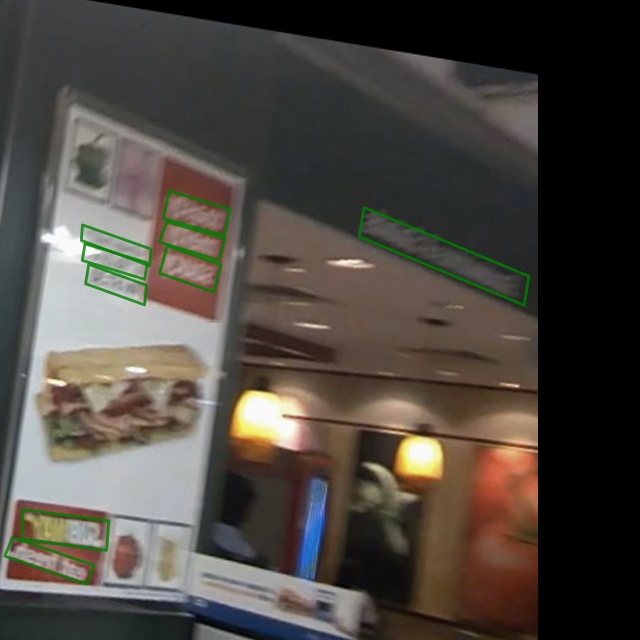
If you just want to visualize the original dataset, simply set the mode to “original”:
python tools/visualizations/browse_dataset.py configs/textdet/dbnet/dbnet_resnet50-dcnv2_fpnc_1200e_icdar2015.py -m original

Or, to visualize the entire pipeline:
python tools/visualizations/browse_dataset.py configs/textdet/dbnet/dbnet_resnet50-dcnv2_fpnc_1200e_icdar2015.py -m pipeline

In addition, users can also visualize the original images and their corresponding labels of the dataset by specifying the path to the dataset config file, for example:
python tools/visualizations/browse_dataset.py configs/textrecog/_base_/datasets/icdar2015.py
Some datasets might have multiple variants. For example, the test split of icdar2015 textrecog dataset has two variants, which the base dataset config defines as follows:
icdar2015_textrecog_test = dict(
    ann_file='textrecog_test.json',
    # ...
    )

icdar2015_1811_textrecog_test = dict(
    ann_file='textrecog_test_1811.json',
    # ...
)
In this case, you can specify the variant name to visualize the corresponding dataset:
python tools/visualizations/browse_dataset.py configs/textrecog/_base_/datasets/icdar2015.py -p icdar2015_1811_textrecog_test
Based on this tool, users can easily verify if the annotation of a custom dataset is correct.
Hyper-parameter Scheduler Visualization
This tool aims to help the user to check the hyper-parameter scheduler of the optimizer (without training), which support the “learning rate” or “momentum”
Introduce the scheduler visualization tool
python tools/visualizations/vis_scheduler.py \
    ${CONFIG_FILE} \
    [-p, --parameter ${PARAMETER_NAME}] \
    [-d, --dataset-size ${DATASET_SIZE}] \
    [-n, --ngpus ${NUM_GPUs}] \
    [-s, --save-path ${SAVE_PATH}] \
    [--title ${TITLE}] \
    [--style ${STYLE}] \
    [--window-size ${WINDOW_SIZE}] \
    [--cfg-options]
Description of all arguments:
config: The path of a model config file.-p, --parameter: The param to visualize its change curve, choose from “lr” and “momentum”. Default to use “lr”.-d, --dataset-size: The size of the datasets. If set,build_datasetwill be skipped and${DATASET_SIZE}will be used as the size. Default to use the functionbuild_dataset.-n, --ngpus: The number of GPUs used in training, default to be 1.-s, --save-path: The learning rate curve plot save path, default not to save.--title: Title of figure. If not set, default to be config file name.--style: Style of plt. If not set, default to bewhitegrid.--window-size: The shape of the display window. If not specified, it will be set to12*7. If used, it must be in the format'W*H'.--cfg-options: Modifications to the configuration file, refer to Learn about Configs.
Note
Loading annotations maybe consume much time, you can directly specify the size of the dataset with -d, dataset-size to save time.
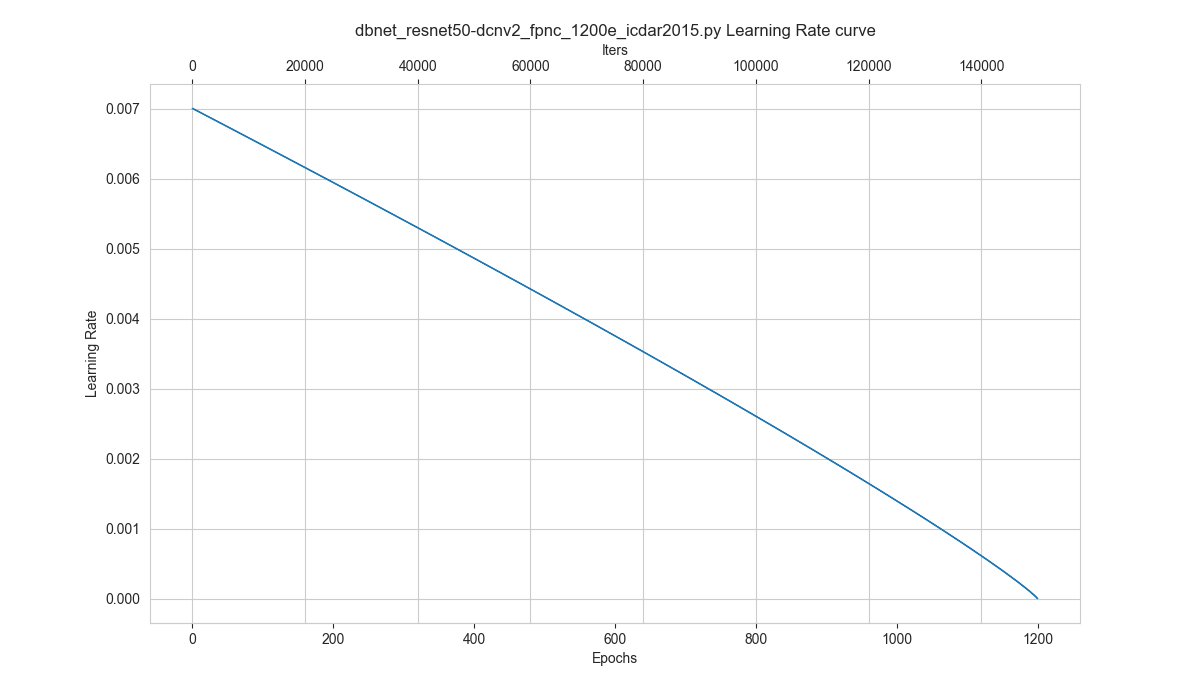
How to plot the learning rate curve without training
You can use the following command to plot the step learning rate schedule used in the config configs/textdet/dbnet/dbnet_resnet50-dcnv2_fpnc_1200e_icdar2015.py:
python tools/visualizations/vis_scheduler.py configs/textdet/dbnet/dbnet_resnet50-dcnv2_fpnc_1200e_icdar2015.py -d 100
Analysis Tools
Offline Evaluation Tool
For saved prediction results, we provide an offline evaluation script tools/analysis_tools/offline_eval.py. The following example demonstrates how to use this tool to evaluate the output of the “PSENet” model offline.
# When running the test script for the first time, you can save the output of the model by specifying the --save-preds parameter
python tools/test.py ${CONFIG_FILE} ${CHECKPOINT_FILE} --save-preds
# Example: Testing on PSENet
python tools/test.py configs/textdet/psenet/psenet_r50_fpnf_600e_icdar2015.py epoch_600.pth --save-preds

# Then, using the saved outputs for offline evaluation
python tools/analysis_tool/offline_eval.py ${CONFIG_FILE} ${PRED_FILE}
# Example: Offline evaluation of saved PSENet results
python tools/analysis_tools/offline_eval.py configs/textdet/psenet/psenet_r50_fpnf_600e_icdar2015.py work_dirs/psenet_r50_fpnf_600e_icdar2015/epoch_600.pth_predictions.pkl
-save-preds saves the output to work_dir/CONFIG_NAME/MODEL_NAME_predictions.pkl by default
In addition, based on this tool, users can also convert predictions obtained from other libraries into MMOCR-supported formats, then use MMOCR’s built-in metrics to evaluate them.
| ARGS | Type | Description |
|---|---|---|
| config | str | (required) Path to the config. |
| pkl_results | str | (required) The saved predictions. |
| --cfg-options | float | Override configs.Example |
Calculate FLOPs and the Number of Parameters
We provide a method to calculate the FLOPs and the number of parameters, first we install the dependencies using the following command.
pip install fvcore
The usage of the script to calculate FLOPs and the number of parameters is as follows.
python tools/analysis_tools/get_flops.py ${config} --shape ${IMAGE_SHAPE}
| ARGS | Type | Description |
|---|---|---|
| config | str | (required) Path to the config. |
| --shape | int | Image size to use when calculating FLOPs, such as --shape 320 320. Default is 640 640 |
For example, you can run the following command to get FLOPs and the number of parameters of dbnet_resnet18_fpnc_100k_synthtext.py:
python tools/analysis_tools/get_flops.py configs/textdet/dbnet/dbnet_resnet18_fpnc_100k_synthtext.py --shape 1024 1024
The output is as follows:
input shape is  (1, 3, 1024, 1024)
| module                    | #parameters or shape | #flops  |
| :------------------------ | :------------------- | :------ |
| model                     | 12.341M              | 63.955G |
| backbone                  | 11.177M              | 38.159G |
| backbone.conv1            | 9.408K               | 2.466G  |
| backbone.conv1.weight     | (64, 3, 7, 7)        |         |
| backbone.bn1              | 0.128K               | 83.886M |
| backbone.bn1.weight       | (64,)                |         |
| backbone.bn1.bias         | (64,)                |         |
| backbone.layer1           | 0.148M               | 9.748G  |
| backbone.layer1.0         | 73.984K              | 4.874G  |
| backbone.layer1.1         | 73.984K              | 4.874G  |
| backbone.layer2           | 0.526M               | 8.642G  |
| backbone.layer2.0         | 0.23M                | 3.79G   |
| backbone.layer2.1         | 0.295M               | 4.853G  |
| backbone.layer3           | 2.1M                 | 8.616G  |
| backbone.layer3.0         | 0.919M               | 3.774G  |
| backbone.layer3.1         | 1.181M               | 4.842G  |
| backbone.layer4           | 8.394M               | 8.603G  |
| backbone.layer4.0         | 3.673M               | 3.766G  |
| backbone.layer4.1         | 4.721M               | 4.837G  |
| neck                      | 0.836M               | 14.887G |
| neck.lateral_convs        | 0.246M               | 2.013G  |
| neck.lateral_convs.0.conv | 16.384K              | 1.074G  |
| neck.lateral_convs.1.conv | 32.768K              | 0.537G  |
| neck.lateral_convs.2.conv | 65.536K              | 0.268G  |
| neck.lateral_convs.3.conv | 0.131M               | 0.134G  |
| neck.smooth_convs         | 0.59M                | 12.835G |
| neck.smooth_convs.0.conv  | 0.147M               | 9.664G  |
| neck.smooth_convs.1.conv  | 0.147M               | 2.416G  |
| neck.smooth_convs.2.conv  | 0.147M               | 0.604G  |
| neck.smooth_convs.3.conv  | 0.147M               | 0.151G  |
| det_head                  | 0.329M               | 10.909G |
| det_head.binarize         | 0.164M               | 10.909G |
| det_head.binarize.0       | 0.147M               | 9.664G  |
| det_head.binarize.1       | 0.128K               | 20.972M |
| det_head.binarize.3       | 16.448K              | 1.074G  |
| det_head.binarize.4       | 0.128K               | 83.886M |
| det_head.binarize.6       | 0.257K               | 67.109M |
| det_head.threshold        | 0.164M               |         |
| det_head.threshold.0      | 0.147M               |         |
| det_head.threshold.1      | 0.128K               |         |
| det_head.threshold.3      | 16.448K              |         |
| det_head.threshold.4      | 0.128K               |         |
| det_head.threshold.6      | 0.257K               |         |
!!!Please be cautious if you use the results in papers. You may need to check if all ops are supported and verify that the flops computation is correct.